How to?
How to move Windows from a hard drive to an SSD

-
/home/u233641744/domains/voonze.com/public_html/wp-content/plugins/mvp-social-buttons/mvp-social-buttons.php on line 120
- /home/u233641744/domains/voonze.com/public_html/wp-content/plugins/mvp-social-buttons/mvp-social-buttons.php on line 123
- /home/u233641744/domains/voonze.com/public_html/wp-content/plugins/mvp-social-buttons/mvp-social-buttons.php on line 126
- /home/u233641744/domains/voonze.com/public_html/wp-content/plugins/mvp-social-buttons/mvp-social-buttons.php on line 129
https://voonze.com/how-to-move-windows-from-a-hard-drive-to-an-ssd/&t=
Warning: Undefined variable $post in /home/u233641744/domains/voonze.com/public_html/wp-content/plugins/mvp-social-buttons/mvp-social-buttons.php on line 120
Warning: Attempt to read property "ID" on null in /home/u233641744/domains/voonze.com/public_html/wp-content/plugins/mvp-social-buttons/mvp-social-buttons.php on line 120
How to move Windows from a hard drive to an SSD', 'facebookShare', 'width=626,height=436'); return false;" title="Share on Facebook">
How to move Windows from a hard drive to an SSD &url=
Warning: Undefined variable $post in /home/u233641744/domains/voonze.com/public_html/wp-content/plugins/mvp-social-buttons/mvp-social-buttons.php on line 123
Warning: Attempt to read property "ID" on null in /home/u233641744/domains/voonze.com/public_html/wp-content/plugins/mvp-social-buttons/mvp-social-buttons.php on line 123
https://voonze.com/how-to-move-windows-from-a-hard-drive-to-an-ssd/', 'twitterShare', 'width=626,height=436'); return false;" title="Tweet This Post">
https://voonze.com/how-to-move-windows-from-a-hard-drive-to-an-ssd/&media=
Warning: Undefined variable $post in /home/u233641744/domains/voonze.com/public_html/wp-content/plugins/mvp-social-buttons/mvp-social-buttons.php on line 126
Warning: Attempt to read property "ID" on null in /home/u233641744/domains/voonze.com/public_html/wp-content/plugins/mvp-social-buttons/mvp-social-buttons.php on line 126
https://voonze.com/wp-content/uploads/2022/06/Windows-en-SSD-1000x600.jpg&description=
Warning: Undefined variable $post in /home/u233641744/domains/voonze.com/public_html/wp-content/plugins/mvp-social-buttons/mvp-social-buttons.php on line 126
Warning: Attempt to read property "ID" on null in /home/u233641744/domains/voonze.com/public_html/wp-content/plugins/mvp-social-buttons/mvp-social-buttons.php on line 126
How to move Windows from a hard drive to an SSD', 'pinterestShare', 'width=750,height=350'); return false;" title="Pin This Post">
How to move Windows from a hard drive to an SSD&BODY=I found this article interesting and thought of sharing it with you. Check it out:
Warning: Undefined variable $post in /home/u233641744/domains/voonze.com/public_html/wp-content/plugins/mvp-social-buttons/mvp-social-buttons.php on line 129
Warning: Attempt to read property "ID" on null in /home/u233641744/domains/voonze.com/public_html/wp-content/plugins/mvp-social-buttons/mvp-social-buttons.php on line 129
https://voonze.com/how-to-move-windows-from-a-hard-drive-to-an-ssd/">
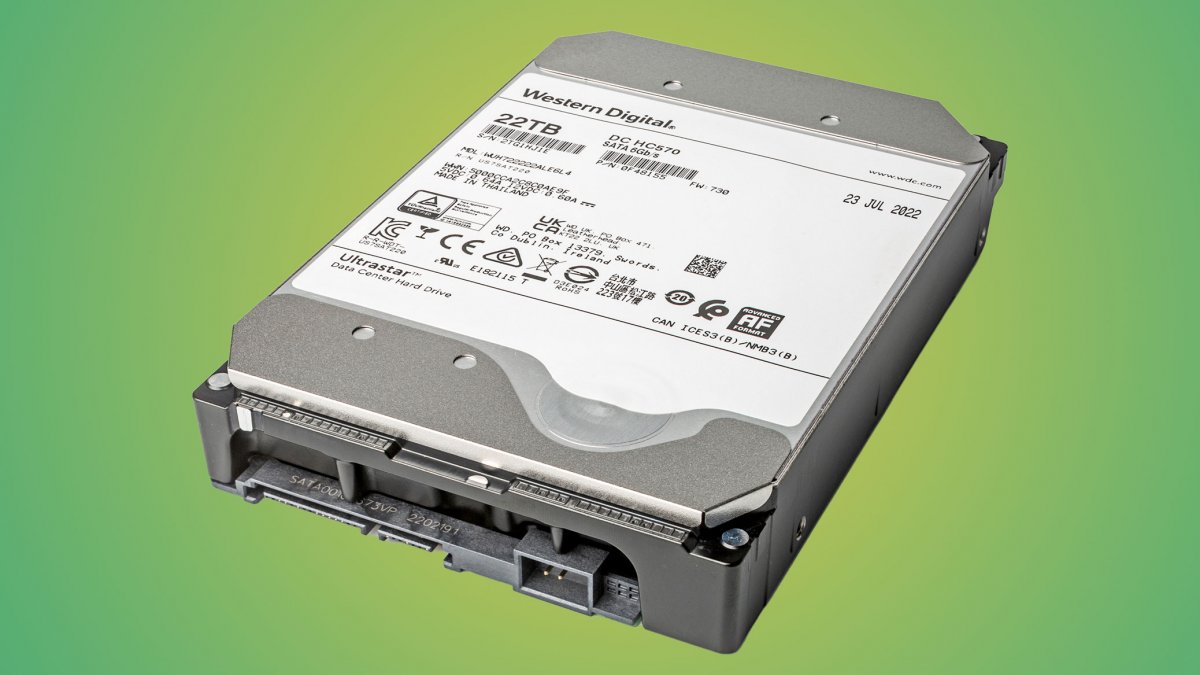
The change of a hard drive for an SSD is one of the more interesting hardware upgrades that we can do on any computer equipment, since these solid state drives offer a good number of advantages in terms of performance, consumption or noise emission.
The benefits are immediate due to its higher speed in data transfer, better operating system boot times, in access to applications or in restarts from sleep or hibernation modes, in addition to occupying less space in the case that we opt for an M.2 drive connected to PCIe.
Physically replacing a hard drive with an SSD is a simple task as we saw in this tutorial. But it also implies moving the installation of Windows (or another operating system) in case we want to keep the existing operating system, applications, settings and personal user data.
How to move Windows to SSD
Most SSD manufacturers include cloning tools with the purchase of the units. The basic idea is to create an image of the hard drive’s operating system partition and move it to the SSD. On a desktop PC, you simply install the SSD next to the hard drive and clone.
If we have a laptop with a single bay, the issue changes and we will need conversion kits and/or cabling that passes the data from a USB to the SSD interface, usually SATA, before replacing the units. If we do not have this type of adapter or cloning software, we can use another method that is used to move any Windows system installed on a hard drive and then copy it to a USB, keeping the partitions, system, applications and all the data.
Delete unnecessary files if you need
The only advantage of hard drives over SSDs is their lower price per GB and therefore hard drives tend to have a higher capacity. Cloning is a 1:1 copy, so the capacity of the SSD must have a minimum size to the amount of data to be transferred. An example. If we have a partition with 300 Gbytes of data occupied on the hard drive and the SSD is 250 GB, we will have to reduce 50 GB to be able to transfer the data.
In these cases, either we purchase solid-state drives with a higher capacity or we must previously delete unnecessary files, freeing up space with the Windows disk cleaner, uninstalling some applications or games, or simply deleting files from the explorer.
Third Party Software
There is a specific type of software that will help us perform data migration. If the manufacturer of the SSD has not provided it to you, you can use the Macrium Reflect application that we put as an example. It is available in a free version and a trial for testing for 30 days and it works really well. We leave you with the step by step:
- We download and install the application on our computer.
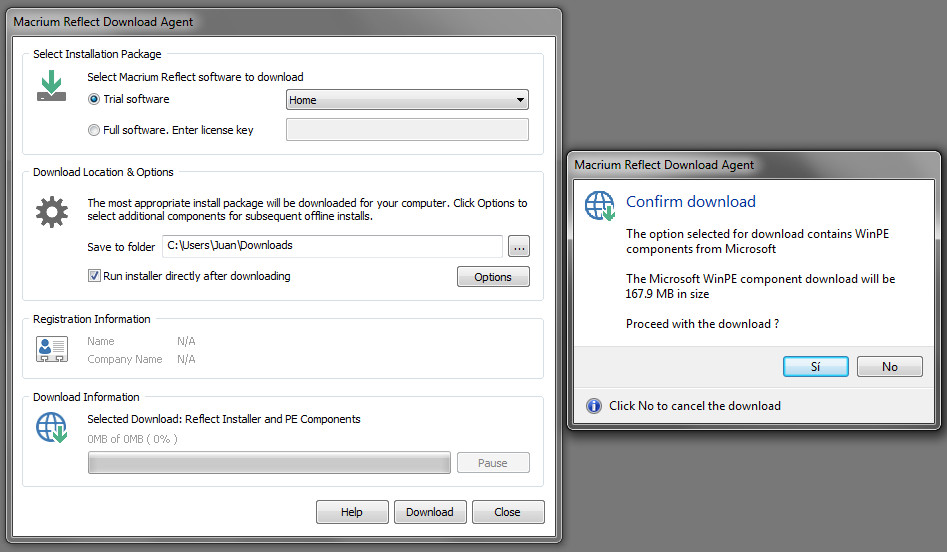
- We create the boot drive. The Macrium installer will take care of downloading the necessary Windows PE files to create the bootable drive. We can record it on a CD/DVD optical drive, on a USB flash drive or on an external storage unit that we will also use in the next step to create the backup image.
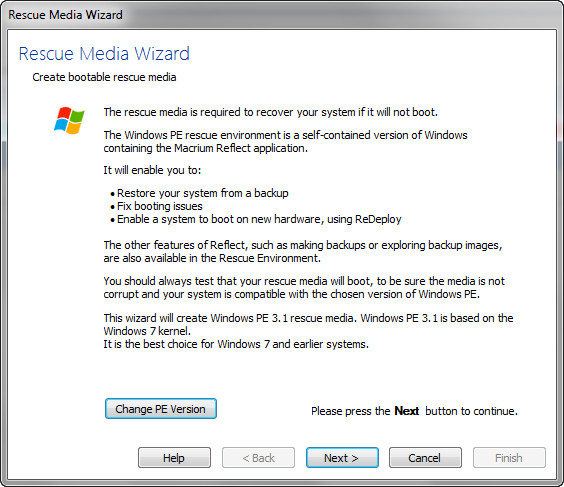
- From the same Macrium Reflect we can create the backup of our computer. Activate the creation of a “backup -disk image”, mark all partitions and select the folder on the external drive where it will be created.
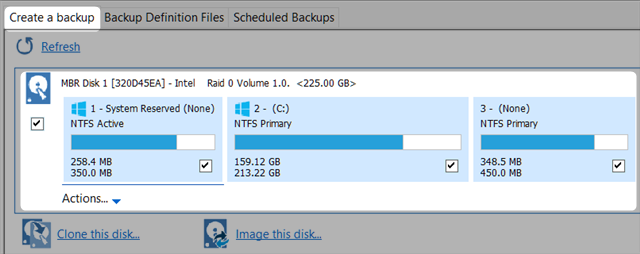
- Once the boot disk and backup have been created, it is time to replace the hard drive with the SSD. As the vast majority of these SATA drives have a standard 2.5-inch format, we will need a 3.5-inch adapter to attach it to our PC tower. If it is a laptop it is a matter of replacing one unit with another.
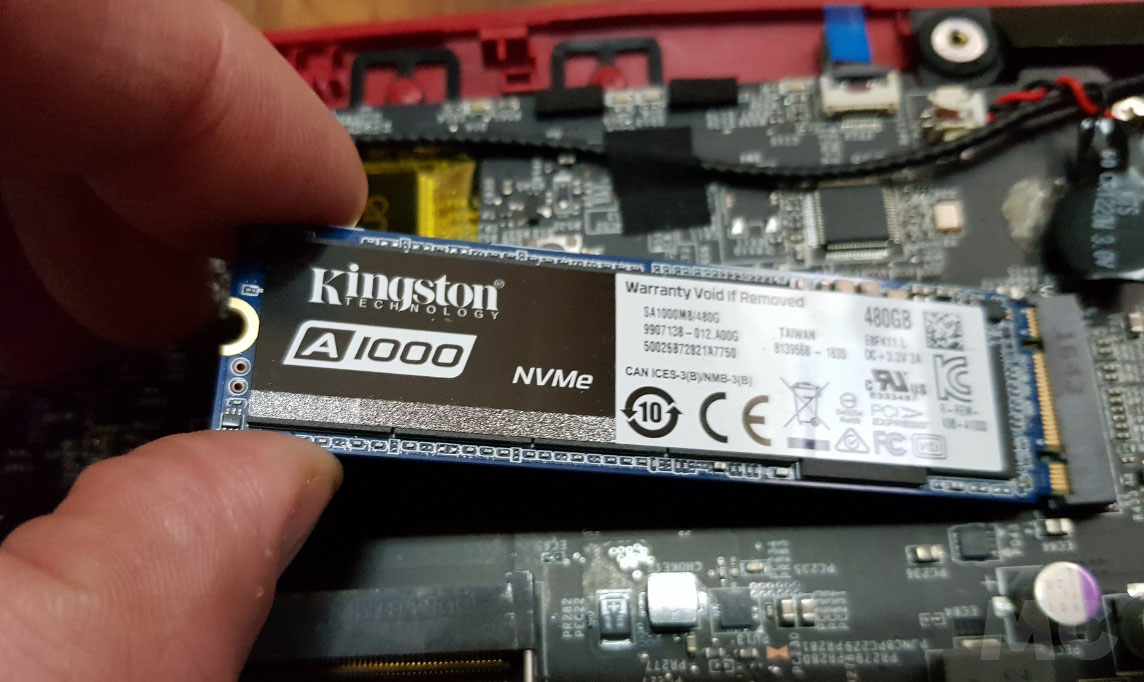
- Once the SSD is installed, reboot the computer from the boot drive created on CD/DVD, pen drive or external USB drive. Select the created backup image.

- Select to copy all data to the destination SSD by dragging and dropping each partition onto the SSD. Macrium Reflect carries out the entire process automatically and even changes the size of the partitions so that they fit on the SSD, although it is important to point out the important precaution, the SSD must have a size greater than the amount of data to be transferred.
Personally, on a storage drive replacement and after safeguarding personal files, I would recommend performing a clean installation from scratch using a boot disk or the manufacturer’s recovery disks. But if you prefer to perform a hard drive clone to move an entire Windows installation and its data, this method will work for you.
-
/home/u233641744/domains/voonze.com/public_html/wp-content/plugins/mvp-social-buttons/mvp-social-buttons.php on line 120
- /home/u233641744/domains/voonze.com/public_html/wp-content/plugins/mvp-social-buttons/mvp-social-buttons.php on line 123
- /home/u233641744/domains/voonze.com/public_html/wp-content/plugins/mvp-social-buttons/mvp-social-buttons.php on line 126
- /home/u233641744/domains/voonze.com/public_html/wp-content/plugins/mvp-social-buttons/mvp-social-buttons.php on line 129
https://voonze.com/how-to-move-windows-from-a-hard-drive-to-an-ssd/&t=
Warning: Undefined variable $post in /home/u233641744/domains/voonze.com/public_html/wp-content/plugins/mvp-social-buttons/mvp-social-buttons.php on line 120
Warning: Attempt to read property "ID" on null in /home/u233641744/domains/voonze.com/public_html/wp-content/plugins/mvp-social-buttons/mvp-social-buttons.php on line 120
How to move Windows from a hard drive to an SSD', 'facebookShare', 'width=626,height=436'); return false;" title="Share on Facebook">
How to move Windows from a hard drive to an SSD &url=
Warning: Undefined variable $post in /home/u233641744/domains/voonze.com/public_html/wp-content/plugins/mvp-social-buttons/mvp-social-buttons.php on line 123
Warning: Attempt to read property "ID" on null in /home/u233641744/domains/voonze.com/public_html/wp-content/plugins/mvp-social-buttons/mvp-social-buttons.php on line 123
https://voonze.com/how-to-move-windows-from-a-hard-drive-to-an-ssd/', 'twitterShare', 'width=626,height=436'); return false;" title="Tweet This Post">
https://voonze.com/how-to-move-windows-from-a-hard-drive-to-an-ssd/&media=
Warning: Undefined variable $post in /home/u233641744/domains/voonze.com/public_html/wp-content/plugins/mvp-social-buttons/mvp-social-buttons.php on line 126
Warning: Attempt to read property "ID" on null in /home/u233641744/domains/voonze.com/public_html/wp-content/plugins/mvp-social-buttons/mvp-social-buttons.php on line 126
https://voonze.com/wp-content/uploads/2022/06/Windows-en-SSD-1000x600.jpg&description=
Warning: Undefined variable $post in /home/u233641744/domains/voonze.com/public_html/wp-content/plugins/mvp-social-buttons/mvp-social-buttons.php on line 126
Warning: Attempt to read property "ID" on null in /home/u233641744/domains/voonze.com/public_html/wp-content/plugins/mvp-social-buttons/mvp-social-buttons.php on line 126
How to move Windows from a hard drive to an SSD', 'pinterestShare', 'width=750,height=350'); return false;" title="Pin This Post">
How to move Windows from a hard drive to an SSD&BODY=I found this article interesting and thought of sharing it with you. Check it out:
Warning: Undefined variable $post in /home/u233641744/domains/voonze.com/public_html/wp-content/plugins/mvp-social-buttons/mvp-social-buttons.php on line 129
Warning: Attempt to read property "ID" on null in /home/u233641744/domains/voonze.com/public_html/wp-content/plugins/mvp-social-buttons/mvp-social-buttons.php on line 129
https://voonze.com/how-to-move-windows-from-a-hard-drive-to-an-ssd/">


