Photoshop
Shooting in Darkness Without a Tripod: A Step-by-Step Guide to Prevent Noise When Using a High ISO

-
/home/u233641744/domains/voonze.com/public_html/wp-content/plugins/mvp-social-buttons/mvp-social-buttons.php on line 120
- /home/u233641744/domains/voonze.com/public_html/wp-content/plugins/mvp-social-buttons/mvp-social-buttons.php on line 123
- /home/u233641744/domains/voonze.com/public_html/wp-content/plugins/mvp-social-buttons/mvp-social-buttons.php on line 126
- /home/u233641744/domains/voonze.com/public_html/wp-content/plugins/mvp-social-buttons/mvp-social-buttons.php on line 129
https://voonze.com/shooting-in-darkness-without-a-tripod-a-step-by-step-guide-to-prevent-noise-when-using-a-high-iso/&t=
Warning: Undefined variable $post in /home/u233641744/domains/voonze.com/public_html/wp-content/plugins/mvp-social-buttons/mvp-social-buttons.php on line 120
Warning: Attempt to read property "ID" on null in /home/u233641744/domains/voonze.com/public_html/wp-content/plugins/mvp-social-buttons/mvp-social-buttons.php on line 120
Shooting in Darkness Without a Tripod: A Step-by-Step Guide to Prevent Noise When Using a High ISO', 'facebookShare', 'width=626,height=436'); return false;" title="Share on Facebook">
Shooting in Darkness Without a Tripod: A Step-by-Step Guide to Prevent Noise When Using a High ISO &url=
Warning: Undefined variable $post in /home/u233641744/domains/voonze.com/public_html/wp-content/plugins/mvp-social-buttons/mvp-social-buttons.php on line 123
Warning: Attempt to read property "ID" on null in /home/u233641744/domains/voonze.com/public_html/wp-content/plugins/mvp-social-buttons/mvp-social-buttons.php on line 123
https://voonze.com/shooting-in-darkness-without-a-tripod-a-step-by-step-guide-to-prevent-noise-when-using-a-high-iso/', 'twitterShare', 'width=626,height=436'); return false;" title="Tweet This Post">
https://voonze.com/shooting-in-darkness-without-a-tripod-a-step-by-step-guide-to-prevent-noise-when-using-a-high-iso/&media=
Warning: Undefined variable $post in /home/u233641744/domains/voonze.com/public_html/wp-content/plugins/mvp-social-buttons/mvp-social-buttons.php on line 126
Warning: Attempt to read property "ID" on null in /home/u233641744/domains/voonze.com/public_html/wp-content/plugins/mvp-social-buttons/mvp-social-buttons.php on line 126
https://voonze.com/wp-content/uploads/2022/08/f02e67e4b113c1b44420a7e72883df02.jpg&description=
Warning: Undefined variable $post in /home/u233641744/domains/voonze.com/public_html/wp-content/plugins/mvp-social-buttons/mvp-social-buttons.php on line 126
Warning: Attempt to read property "ID" on null in /home/u233641744/domains/voonze.com/public_html/wp-content/plugins/mvp-social-buttons/mvp-social-buttons.php on line 126
Shooting in Darkness Without a Tripod: A Step-by-Step Guide to Prevent Noise When Using a High ISO', 'pinterestShare', 'width=750,height=350'); return false;" title="Pin This Post">
Shooting in Darkness Without a Tripod: A Step-by-Step Guide to Prevent Noise When Using a High ISO&BODY=I found this article interesting and thought of sharing it with you. Check it out:
Warning: Undefined variable $post in /home/u233641744/domains/voonze.com/public_html/wp-content/plugins/mvp-social-buttons/mvp-social-buttons.php on line 129
Warning: Attempt to read property "ID" on null in /home/u233641744/domains/voonze.com/public_html/wp-content/plugins/mvp-social-buttons/mvp-social-buttons.php on line 129
https://voonze.com/shooting-in-darkness-without-a-tripod-a-step-by-step-guide-to-prevent-noise-when-using-a-high-iso/">
Have you ever been to a dark location where you couldn’t use a tripod? You probably needed a very high ISO and accepted the high noise levels. With this step-by-step guide, you can prevent the high ISO noise without the use of specialized noise reduction software.
When you are photographing in a dark environment, you might want to use a tripod or a flashlight. But some situations don’t allow the use of a tripod or flash. Or perhaps you didn’t take a tripod or flashlight with you. In that case, there are a few possibilities left. If your camera has image stabilization, you can make use of that option and take a picture with a very long shutter speed. Or you can bump up the ISO and accept the higher noise levels.

A lot of cameras produce acceptable images with ISO levels that reach up to ISO 6,400. Higher ISO levels are often very noisy, with loss of detail and colors. You might accept the result, just to have an image of that memorable moment, and perhaps you can use specialized noise reduction software to get rid of the extreme noise. Often, it leads to soft images with further loss of detail.
There is a way to get a low noise image, even with an extremely high ISO level. For that, you have to shoot a series of photos of the subject. Small movements between the images can be easily corrected, so there is no need for a tripod. This step-by-step guide will help you. We’ll start with part one, shooting at the location. Next will be part two, the post-processing. For that, you will need to use Photoshop.

Part One: Shooting at the Location
For this method, you will need to shoot the necessary images at the location. There is no need for a tripod or flashlight. Just make sure your shutter speed is fast enough to hold the camera still.
1. Choose the Right Camera Settings
Use your camera in the way you like. Choose the aperture you want and a shutter speed that is fast enough to prevent camera movement. Bump up the ISO level as high as necessary. Set your camera to continuous at the highest speed. If you have image stabilization, turn it on. For this example, I have used my Canon EOS 5D Mark IV at ISO 25,600.
2. Make at Least 10 Images, Preferably More
Make sure you stand in the most stable position possible. Make your composition and shoot a burst of images. I would advise you to shoot at least ten images, but more is better. There is a moment when your camera buffer is full, and the speed will drop significantly. That is often the best moment to stop. Some cameras have a buffer that can hold hundreds of images. More than 20 images are often not necessary.
Part Two: Post Processing
I am using Lightroom for my post-processing and Photoshop for noise reduction. You don’t need to use Lightroom, but you do need Photoshop for this method. I use the Dutch version of the software, but I think the steps will be obvious.
3. Open Your Images and Perform Your Post-Processing
I use Lightroom to make the necessary post-processing steps. Don’t bother about the noise levels, but you might want to set sharpness to zero. Whatever you do, don’t perform any noise reduction. Keep the noise the way it is.
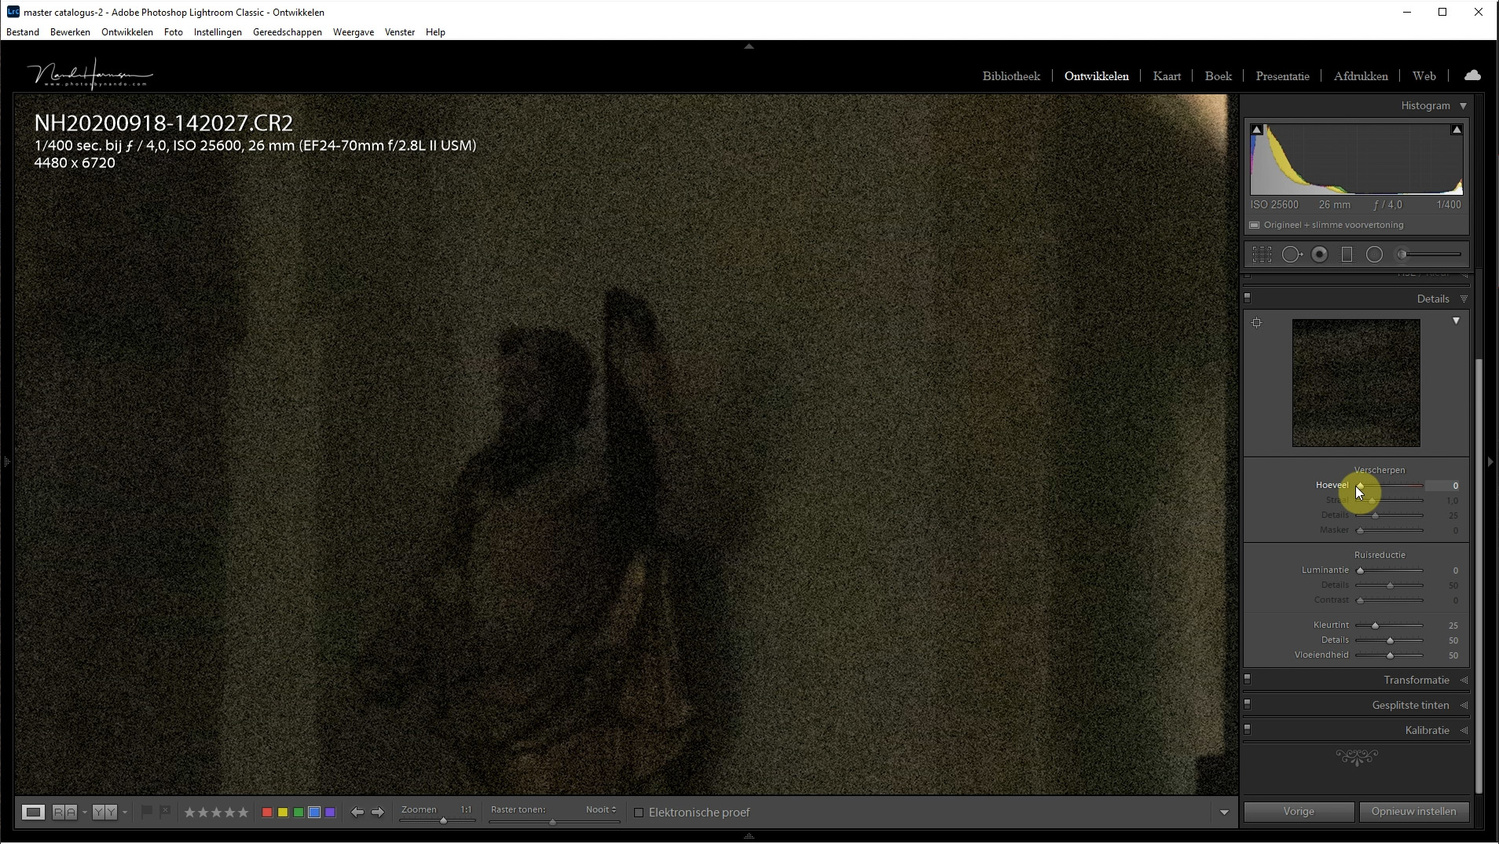
In Lightroom, you can post-process one image and copy the settings to the other ones. Make sure every image has the same post-processing before you continue.
4. Open All Images as Layers in Photoshop
Lightroom makes it possible to open a selection of images as layers in Photoshop. Just select the option from the menu. If you don’t use Lightroom, you will have to open all images in Photoshop yourself and stack every single image as a layer on top of each other manually.

5. Align the Layers
Because the images are handheld, the alignment is far from perfect. Fortunately, Photoshop has an option to align layers automatically. For that, you have to select all layers by pressing the top one, holding shift while selecting the bottom one. Next, select Edit from the top menu and choose Auto-align layers. The popup window allows you to choose different projections. Select Auto, and deselect the lens correction options. Then, press OK. This alignment may take a while, depending on the number of images, the image resolution, and the speed of your computer.

6. Make a Smart Object
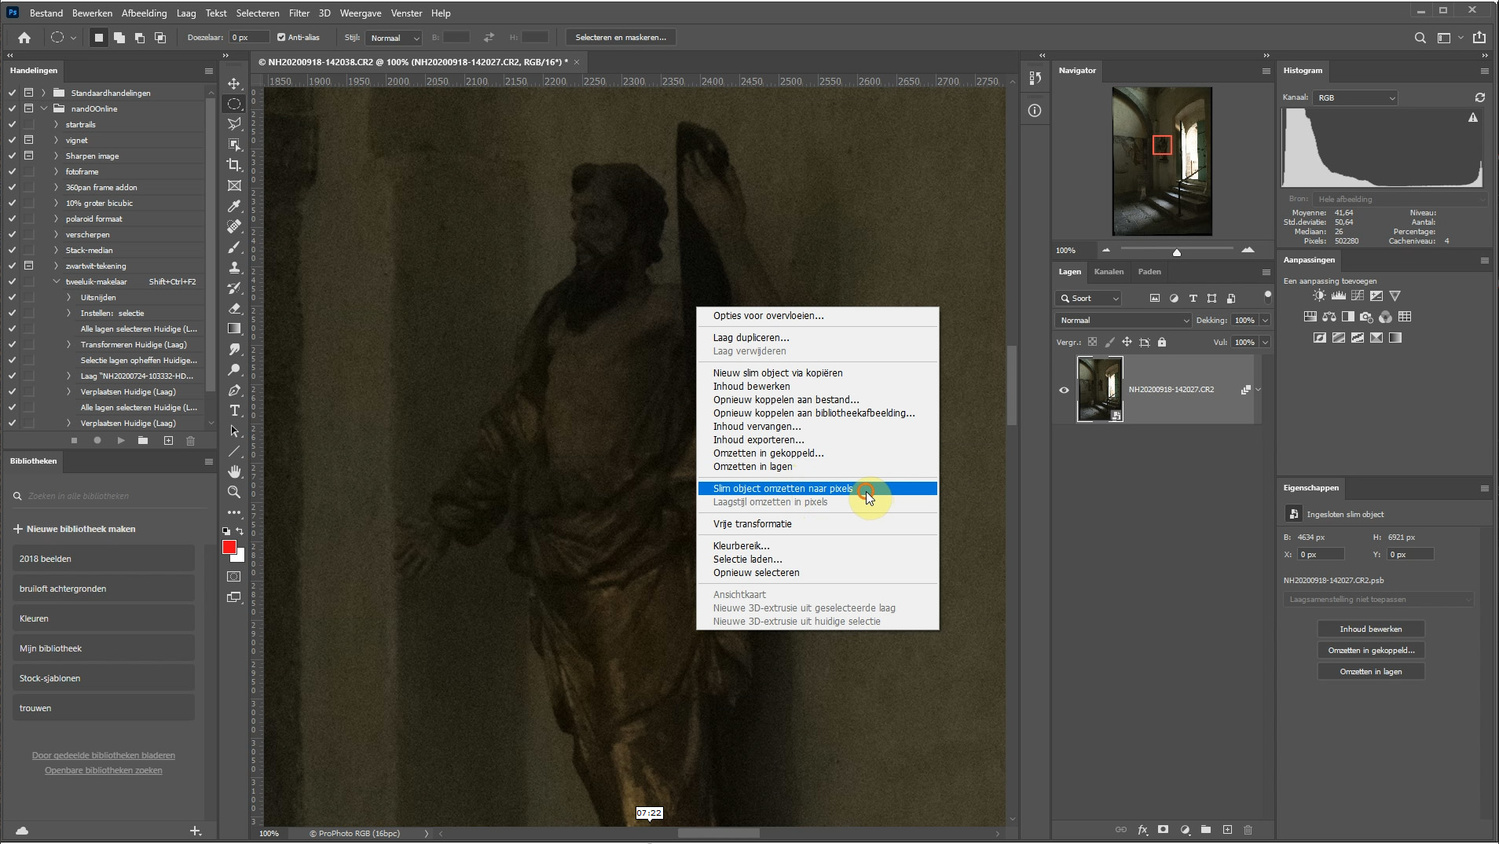
The next step is converting all layers into a smart object. You can find this option by selecting the menu Layer – Smart Object – Convert to Smart Object. Again, this might take a while, depending on the number of layers you have. Just be patient and wait until Photoshop has finished.

7. Stack the Images Together With Median
Now comes the magic. You have to stack all layers inside the Smart Object with the option Median. Just open the Layers menu again, and select the Smart Object. There, you can find different stacking options. Choose the option Median and wait until the images are stacked. After the stacking is completed, the noise in the resulting image will be almost completely gone.

8. Rasterize the Image and Save It
You are almost done. Unless you are planning to keep the stacked Smart Object for further processing, you can rasterize the image, turning it into a regular layer. Just save the image in the file format to your liking. If you started from within Lightroom, saving the image will return it to Lightroom again.
The Result
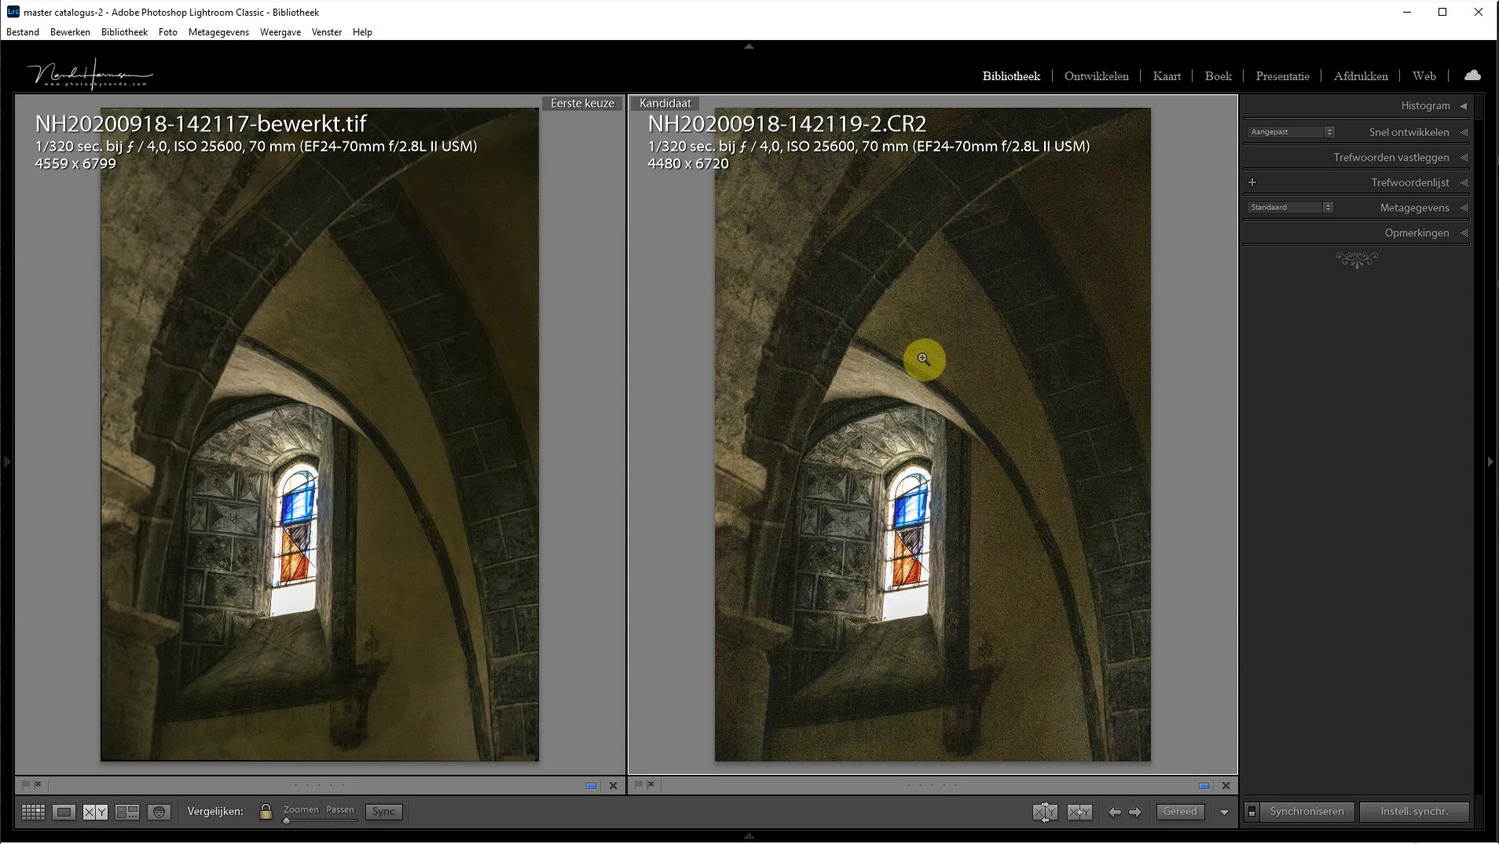
After you are done, compare the image to one of the originals. You will see how the noise is removed and the details have become visible. There might be a bit of noise left, but that can be removed with ordinary noise reduction inside Lightroom of Photoshop. How far you can bump up the ISO with this method will depend on the camera and its ISO performance.

This method can also be used with lower ISO levels and with a camera on a tripod, of course. It will result in very clean images, which allows you to use more extreme post-processing techniques. I use it for my drone photography and astrophotography. But the beauty of this is the ability to use a camera handheld at extremely high ISO levels without the noise levels. Just try it out yourself.

Just keep in mind, this method only works for non-moving objects. If you have movement in the frame, it might result in strange effects. On the other hand, a person moving through the frame will become invisible also.
What do you think? Have you ever used this method before? If you do, please share your experience in the comments below. I would love to hear about it.
-
/home/u233641744/domains/voonze.com/public_html/wp-content/plugins/mvp-social-buttons/mvp-social-buttons.php on line 120
- /home/u233641744/domains/voonze.com/public_html/wp-content/plugins/mvp-social-buttons/mvp-social-buttons.php on line 123
- /home/u233641744/domains/voonze.com/public_html/wp-content/plugins/mvp-social-buttons/mvp-social-buttons.php on line 126
- /home/u233641744/domains/voonze.com/public_html/wp-content/plugins/mvp-social-buttons/mvp-social-buttons.php on line 129
https://voonze.com/shooting-in-darkness-without-a-tripod-a-step-by-step-guide-to-prevent-noise-when-using-a-high-iso/&t=
Warning: Undefined variable $post in /home/u233641744/domains/voonze.com/public_html/wp-content/plugins/mvp-social-buttons/mvp-social-buttons.php on line 120
Warning: Attempt to read property "ID" on null in /home/u233641744/domains/voonze.com/public_html/wp-content/plugins/mvp-social-buttons/mvp-social-buttons.php on line 120
Shooting in Darkness Without a Tripod: A Step-by-Step Guide to Prevent Noise When Using a High ISO', 'facebookShare', 'width=626,height=436'); return false;" title="Share on Facebook">
Shooting in Darkness Without a Tripod: A Step-by-Step Guide to Prevent Noise When Using a High ISO &url=
Warning: Undefined variable $post in /home/u233641744/domains/voonze.com/public_html/wp-content/plugins/mvp-social-buttons/mvp-social-buttons.php on line 123
Warning: Attempt to read property "ID" on null in /home/u233641744/domains/voonze.com/public_html/wp-content/plugins/mvp-social-buttons/mvp-social-buttons.php on line 123
https://voonze.com/shooting-in-darkness-without-a-tripod-a-step-by-step-guide-to-prevent-noise-when-using-a-high-iso/', 'twitterShare', 'width=626,height=436'); return false;" title="Tweet This Post">
https://voonze.com/shooting-in-darkness-without-a-tripod-a-step-by-step-guide-to-prevent-noise-when-using-a-high-iso/&media=
Warning: Undefined variable $post in /home/u233641744/domains/voonze.com/public_html/wp-content/plugins/mvp-social-buttons/mvp-social-buttons.php on line 126
Warning: Attempt to read property "ID" on null in /home/u233641744/domains/voonze.com/public_html/wp-content/plugins/mvp-social-buttons/mvp-social-buttons.php on line 126
https://voonze.com/wp-content/uploads/2022/08/f02e67e4b113c1b44420a7e72883df02.jpg&description=
Warning: Undefined variable $post in /home/u233641744/domains/voonze.com/public_html/wp-content/plugins/mvp-social-buttons/mvp-social-buttons.php on line 126
Warning: Attempt to read property "ID" on null in /home/u233641744/domains/voonze.com/public_html/wp-content/plugins/mvp-social-buttons/mvp-social-buttons.php on line 126
Shooting in Darkness Without a Tripod: A Step-by-Step Guide to Prevent Noise When Using a High ISO', 'pinterestShare', 'width=750,height=350'); return false;" title="Pin This Post">
Shooting in Darkness Without a Tripod: A Step-by-Step Guide to Prevent Noise When Using a High ISO&BODY=I found this article interesting and thought of sharing it with you. Check it out:
Warning: Undefined variable $post in /home/u233641744/domains/voonze.com/public_html/wp-content/plugins/mvp-social-buttons/mvp-social-buttons.php on line 129
Warning: Attempt to read property "ID" on null in /home/u233641744/domains/voonze.com/public_html/wp-content/plugins/mvp-social-buttons/mvp-social-buttons.php on line 129
https://voonze.com/shooting-in-darkness-without-a-tripod-a-step-by-step-guide-to-prevent-noise-when-using-a-high-iso/">

